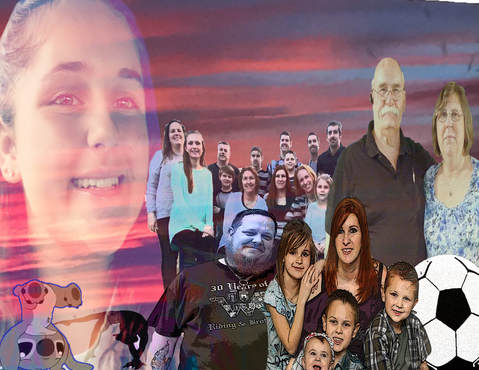
This is a project that I did in my photoshop class. The assignment was to make a collage of things that were important to me. As you can see, my family is the most important thing to me, that is why there are so many pictures of them. There were a couple of tools I used to cut out the pictures. I used what we call the quick selection tool. What it does is when you click on an object, it grabs the object and basically cuts it out so that you can drag it to where you want it. This tool was really helpful to me and helped my pictures look good altogether.
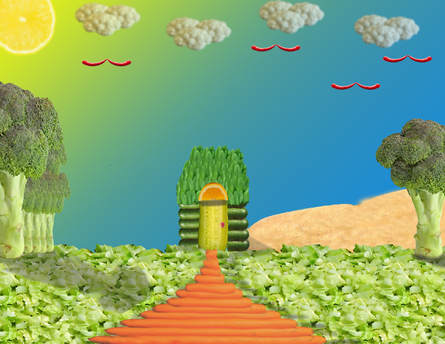
This is a vegetable and fruit landscape that I was assigned in my Photoshop class. It was a challenge but I did it. For all of the objects in this picture, I used the quick selection tool to cut them out of their original picture. For the clouds I used cauliflower. I blurred the clouds by using what is called a gaussian blur. The gaussian blur helps blur an object so that it is not so defined or so that it does not have so much texture to it. For the hills I used potatoes. I used what is called the clone stamp tool to make the potatoes all one main color instead of having so many different shades of brown. For the walkway leading up to the house, I used carrots. I used the smudge tool which is like the blur tool but instead of blurring the object, it smudges it so that the line is not so sharp. Lastly, for the shadows, I used the paint brush tool. While using this tool, I reduced the hardness of it meaning I made the brush color lighter which made the shadows lighter.
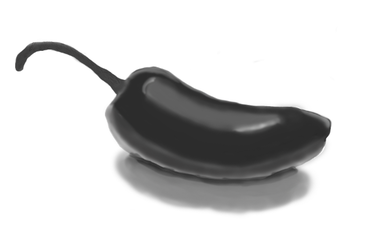
As you can see, this is a jalapeno. For this project I had to find a picture of my favorite fruit or vegetable. I had to draw the outline of the vegetable, turn it grey, and then I had to sample colors from the greyscale picture and re-paint the jalapeno with the colors I sampled. It was a challenge but it somehow came out pretty good to me. I had to make up a shadow on my picture because the original picture I had chosen did not have a shadow. For the texture on the stem, I had to make my own brush. I made my own brush by making the pattern I needed, going to edit, clicking brush remake, and then boom, I made my own brush. This project was both fun and frustrating but I hope you like the finished product as much as I do.
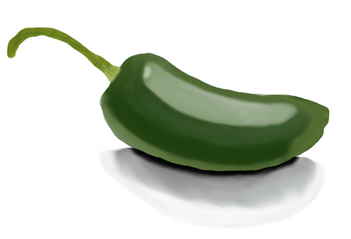
For this project, I had to take the grayscale picture ( shown above this picture ) and I had to change it back to the original color. I did not use colors from the paint gallery to paint this. Just like in the grayscale, I had to sample the colors and use what I sampled to paint the jalapeno. I also had to make up the shadow. I basically did the same steps on this colored jalapeno that I did on the grayscale jalapeno. The only thing that changed was the color.
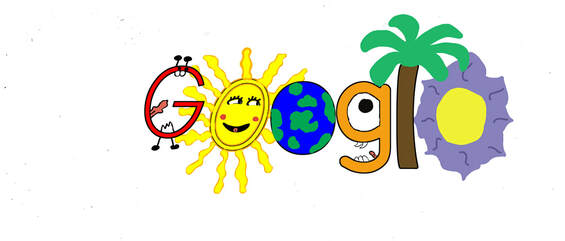
In my digital media and entertainment arts class, my teacher wanted us to do a Doodle for Google project. Every year Google has a Doodle for Google competition. For the competition, there is always a theme that you have to go by. This years theme was, "When I grow up..." I decided to say, " When I grow up, I want the world to be just as unique then as it is today. The world is so crazy and unique, if everything was the same our world would be boring." I did not draw the letters in the image to the left, but I did draw everything that is on or around them. The first G is supposed to be a monster/alien that is screaming. The two O's are the sun and the Earth. The second G is another alien/monster and is supposed to look like it is screaming with the first alien/monster. The L is a palm tree and last but not least, the E is a flower. I did draw the E by hand along with everything else in the picture, but I did not type the letter E like I did the other letters. This project was not as easy as it looks but it was kind of fun to make.
This is called a rainbow strobe animation because it has many different colors and they change. It is one picture with multiple layers but in each layer, the picture is a different color. This was very fun to make because there are so many colors you can choose from and it was very easy. In photoshop, I had to used what is called the magic eraser tool. This tool is just like and eraser but instead of going back and forth as you would to use a normal eraser, you click on an area and it erases everything around what you clicked. I would definitely make one of these again if it were assigned to me.
|
This is an emoji that I created. We all know that an emoji is supposed to represent something or someone. This emoji to the left represents me. I am happy and upbeat most of the time and so I put a smile on my emoji. I love to play soccer and so I drew a soccer ball in my hand. It took me about a week to complete this project. I got really frustrated with it when I was working on it because some things would not come out the way I wanted them to. I tried adding eyelashes but my emoji looked really really weird with them, so I just left them out. The next emoji I am making is going to be a celebrity so stay tuned!
|
This is the celebrity emoji. I did Dora the explorer. I did not pick her for my celebrity at first. I chose to do Zendaya but when I was finished with the character, I thought it looked more like Dora instead of Zendaya; so I decided to do Dora. I think I did a pretty good job and I am actually kind of proud of my work. It may be a little kid cartoon character but it was fun to make! The animation that is along with it was even more fun to create. It was really simple and took all of 30 seconds maybe. There were stressful moments making this character but it al worked out.
